Basically there is no need to install TetView. The windows version (tetview-win.exe) is directly executable.
For the version of Linux or SGI, you need to unzip the archive (i.e., tetview-xxx.gz) by
gunzip tetview-xxx.gzperhaps you need to enable the executable permission of the unzipped file by
chmod +x tetview-xxxUnzip and extract the example files (examples.tar.gz) of TetView. Save these files into the same directory where you have the executable version of TetView. You will find the following new files in this directory:
After you've done this, you can test if TetView has been installed by typing:
tetview (or ./tetview)
If TetView works correctly, the following information will display on screen:
Lua 5.0 Copyright (C) 1994-2003 Tecgraf, PUC-Rio
TetView Version 1.0 (June 2004)
Type Ctrl+D to exit.
tetview>
On default, TetView starts the lua script environment, you can run lua scripts or special commands available in TetView. For this tutorial you will not need lua script environment, but learn how to use the graphic user interface of TetView. Exit it by typing 'Ctrl+D'.
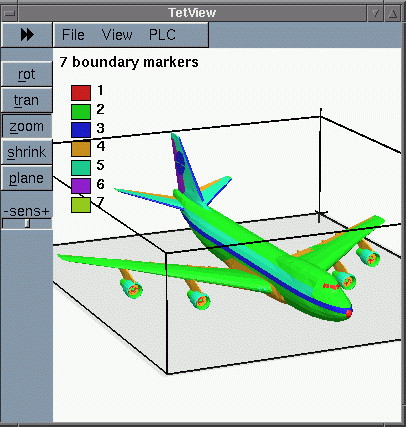
The graphic user interface (GUI) is a window where user can see and manipulate the viewing objects. TetView's GUI (shown below) contains three parts: menu bar, mouse control panel, and rendering area.

The menu bar appears on the top of the window. It is consisted by a main menu and submenus. For different objects (PLC or mesh), a different submenu is provided. One can use mouse to select menu items. Each menu item also has a key shortcut which has same effect as mouse selection.
The mouse control panel appears at the left of the window. It
contains the most frequently used motions like rotation, translation
and zoom in/out. It is separate from the main menu for quickly mouse
accessing and switching between motions.
A mouse sensitive
slider at the button of this panel is used to adjust the
sensitivity of the mouse movement.
The rendering area occupies the rest area of the window. It is the place where objects (PLCs, meshes, etc.) be displayed and rendered.
Viewing Piecewise Linear Complex
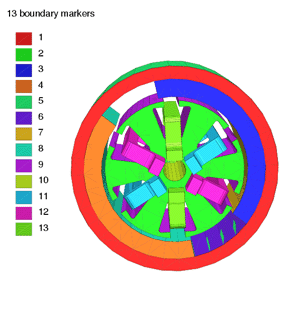
A piecewise linear complex (PLC) is described in files ``pmdc.node'' and ``pmdc.poly''. It is a model of a permanent magnetic motor machine. To see this PLC, type the following command in the shell window:
tetview pmdc.poly
This command starts up TetView and automatically loads these two
files. Some information about this PLC will be displayed in shell
window as follows:

It briefly shows that this PLC is consisted by 972 vertices, 502
facets, 4 different regions. At the same time, TetView should open a
graphic window and in it you should see the motor (as the picture
shown below).
Put the mouse cursor in the window and press down and hold the left mouse button. While holding down the button, move the mouse around. You should see the picture rotate in the direction you move the mouse. Release the mouse button to stop it. You can change the rotating speed by adjusting the sensitive slider at the button of the mouse control panel. Move the slider to the leftward, then rotate the object. You will find the rotating speed is slow down. Conversely, move the slider to the rightward will increase the rotating speed.
The motion that you have been applying up to now is rotation, because that is the motion mode that is selected in the mouse control panel. You will see the rot button is pushed down which indicates it's the current mouse operation mode. To translate instead, click on the tran button. Now when you move the mouse in the window while holding down the left button, the object will translate in the direction you move the mouse. Notice that you can translate it beyond the edge of the window as long as you keep holding the left mouse button down. Lift up on the mouse button to stop the translation. It is the same as changing the rotating speed, you can change the translating speed by adjusting the sensitive slider. After translation, click the rot button on the panel will switch back to the rotation mode.
If you accidentally lose the object by translating it too far out of the window, you can get it back by selecting the Reset State menu item in the submenu of File on the menu bar. This causes it to come back to its initial position.
When the button zoom in the mouse control panel is selected, it allows to zoom in or zoom out the object only using the left button of the mouse. And the same to use sensitive slider to change the zoom speed.
Until now, we have explored the mouse control operations. To view or hide special items of PLC, click the menu item PLC on the menu bar. The menu items in submenu of PLC contains options to view the sets of vertices, segments and vertices of PLC. Each mouse click on the menu item will cause one set switches on/off. After you finish, select the Exit menu item from the File menu or type 'Ctrl+Alt+x' to close the window and exit TetView.
The tetrahedral mesh of the motor is stored in three files, ``pmdc.1.node'', ``pmdc.1.ele'' and ``pmdc.1.face''. To see this mesh using TetView, type the following command in the shell window:
tetview pmdc.1
This command starts up TetView and automatically loads these three
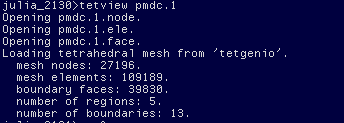
files. Some information about this mesh will be displayed in shell
window as follows:
After loading the mesh, TetView opens a window and displays the mesh. You can use the mouse to rotate, translate or zoom in/out it as the previous section does.
Besides using the mouse to control mesh viewing, TetView offers the keyboard shortcuts, which are much easier and quickly than mouse clicks. Each keyboard shortcut is displayed in front of the operations on the mouse control panel. For instance, 'r' activates the rotation, 't' activates the translation and 'z' activates the zoom in/out. Put the mouse inside the window and try them out yourself and you will find they are very convenient to use. Notice that these keyboard shortcuts is case sensitive.
In order to see the inside elements and different regions of the mesh,
a cutting plane is used to remove the part of mesh above the plane. So
the cross-section of the mesh object can be seen. To enable or disable
cutting plane, type 'F1' (or click the menu item ``Ciut Plane'' in the
submenu of ``View''). The cutting plane can be choosen to cut mesh
along x, y or z-axis. The corresponding keyboard shortcuts are
'Alt+x', 'Alt+y' and 'Alt+z' (or choose the menu items in submenu of
``View''). Default the cutting plane cuts at the middle of the
mesh. You can move the cutting plane (along axis) by mouse. To do
this, type 'p' (or click ``plane'' button on mouse control panel),
then move mouse to move the plane. The moving speed can be adjusted by
the mouse sensitive slider. With the help of cutting plane, we can see
the inside elements and different region of the mesh. The following
picture shows one effect of the cutting plane.
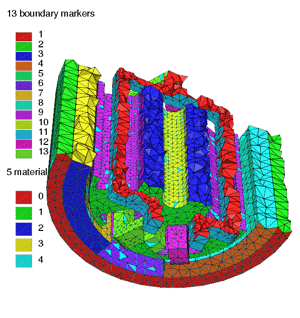
Use shrink mode, you can shrink the mesh elements (tetrahedra or triangles) to disconnect them each other. It helps to understand the shape of elements and the mesh topology. To switch on/off shrink mode, type 'F5' (or click the menu item ``Shrink'' in the submenu of ``View''). TetView default switches on the shrink mode. You can adjust the amount of shrink by typing 's' (or choosing ``shrink'' button on mouse control panel), then use mouse to increase or decrease the shrinking effect. The changing speed can be adjusted by the mouse sensitive slider.
The submenu ``Mesh'' contains the options to show or hide specified mesh items, i.e., edges, vertices, faces, etc. Default, TetView shows all the faces and edges of the mesh. You can switch off the faces by typing 'f' (or selecting menu item ``shade'' under ``view'' submenu), so all inside edges can be seen. You can try out these menu items by selecting them.
After you finish, select the ``Exit'' menu item from the ``File'' menu or type 'Ctrl+Alt+x' to close the window and exit TetView.
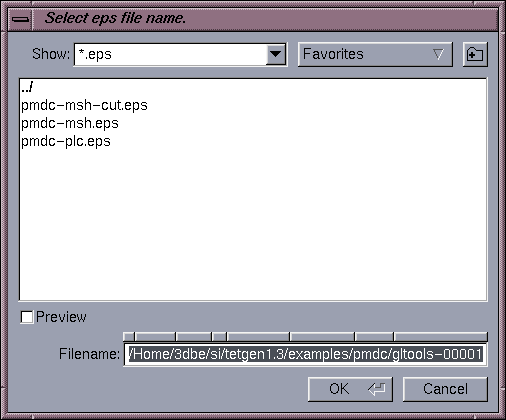
TetView is able to dump the rendered graphics in current window into vector postscript files or PPM files. Such files can be used to insert figures in document. For instance, many figures used in this document are created by this feature. To dump a graphic in current window, select the menu item ``Dump EPS'' under ``File'' submenu. A file dialog will appear (as shown below). You can specify a file name in this dialog or use the default one. Then click the ``ok'' button to close the dialog and the graphic in current window will be saved into file.
